Create a Valkey Instance
This is an example of how to create a Valkey instance.
1. Create a ValkeyInstance manifest
Create an ValkeyInstance manifest and deploy it to the cluster. It is a good practice to include it in the application's Helm chart.
Security group and security group rules which allow access to the ValkeyInstance from pods are created automatically.
# Example ValkeyInstance
apiVersion: database.entigo.com/v1alpha1
kind: ValkeyInstance
metadata:
  name: example-valkey
spec: {}

---
# Example ValkeyInstance with deletion protection disabled
apiVersion: database.entigo.com/v1alpha1
kind: ValkeyInstance
metadata:
  name: example-valkey-no-deletion-protection
spec:
  deletionProtection: false

---
# Example ValkeyInstance with custom parameter group
apiVersion: database.entigo.com/v1alpha1
kind: ValkeyInstance
metadata:
  name: example-valkey-with-custom-settings
spec:
  deletionProtection: true
  engineVersion: '8.2'
  instanceType: 'cache.t4g.small'
  numCacheClusters: 3
  autoMinorVersionUpgrade: true
  maintenanceWindow: 'mon:00:00-mon:03:00'
  snapshotWindow: '05:00-06:00'
  snapshotRetentionLimit: 10
  parameterGroupName: 'default.valkey8'

---
# Example ValkeyInstance with custom parameters
apiVersion: database.entigo.com/v1alpha1
kind: ValkeyInstance
metadata:
  name: example-valkey-with-custom-settings
spec:
  parameterGroupParameters:
    notify-keyspace-events: Ex
2. Mount ValkeyInstance credentials to a container
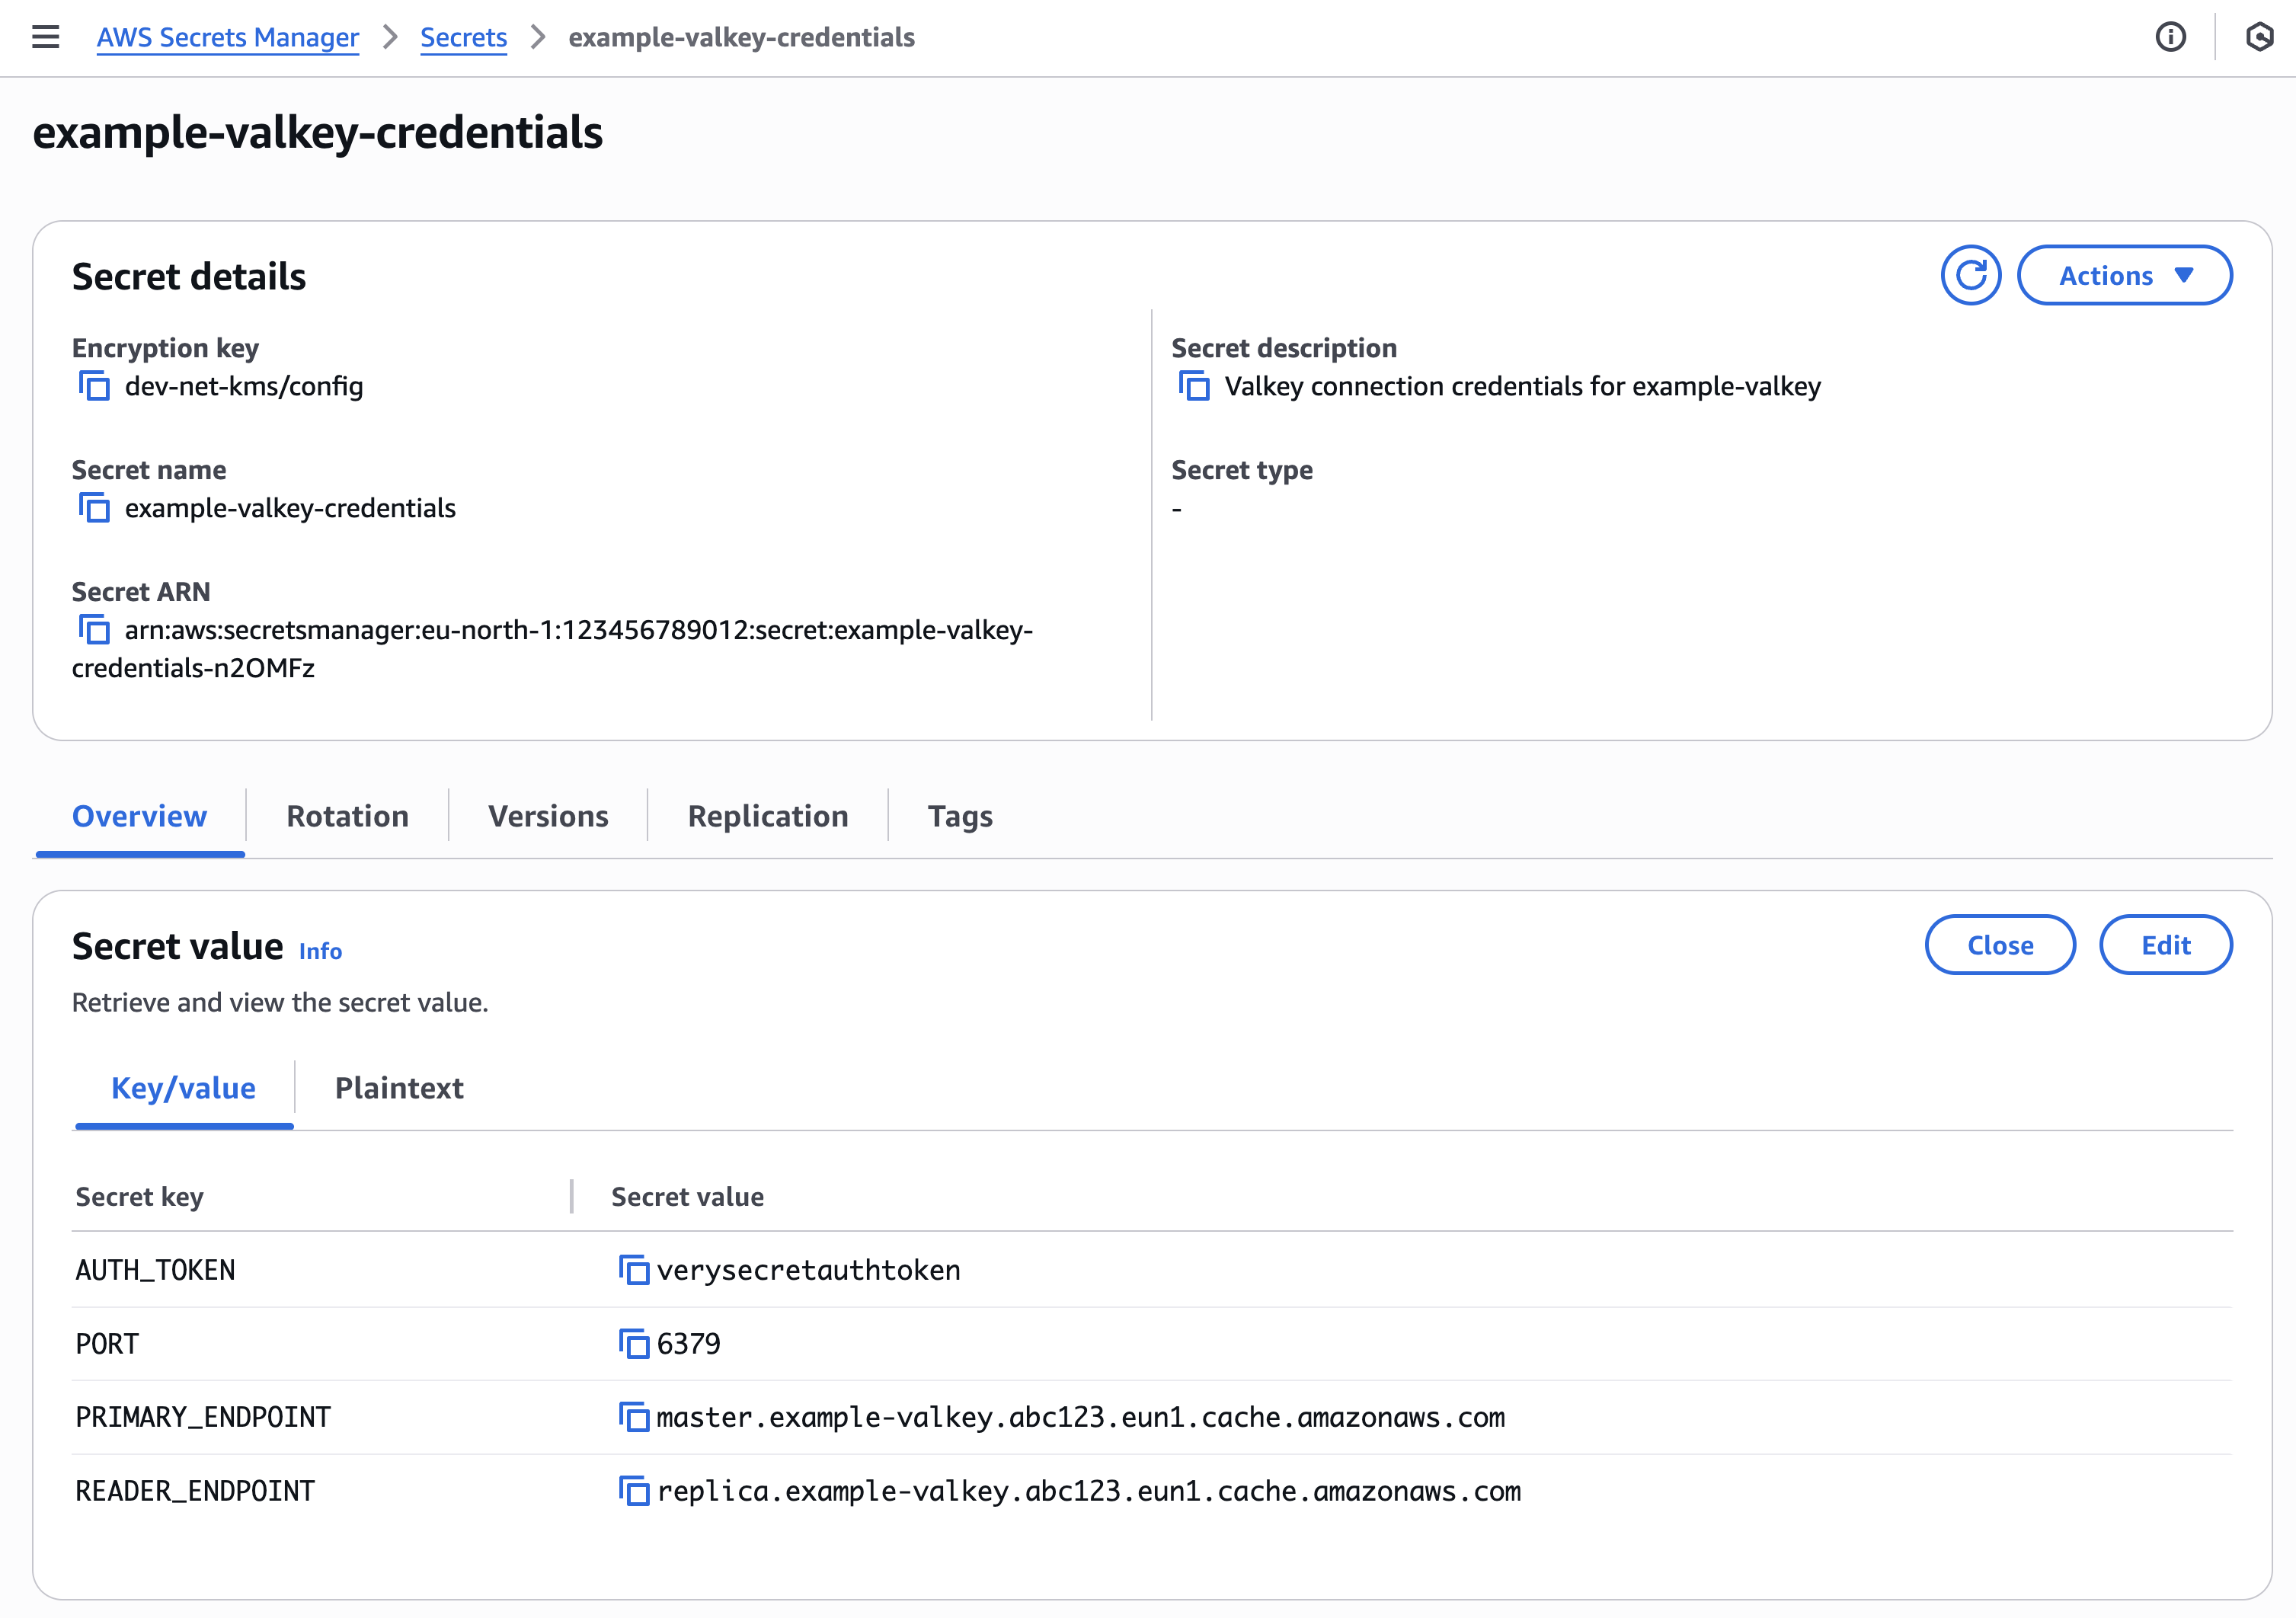
Connection information for ValkeyInstance is stored in a Kubernetes secret and AWS Secrets Manager secret <ValkeyInstance-name>-credentials
For more information about Secrets in Kubernetes, see Kubernetes documentation.
# Example 1
apiVersion: v1
kind: Pod
metadata:
  name: redis
spec:
  containers:
    - name: redis
      image: redis:alpine
      command: ['sleep', 'infinity']
      envFrom:
        - secretRef:
            name: example-valkey-credentials

---
# Example 2
apiVersion: v1
kind: Pod
metadata:
  name: redis
spec:
  containers:
    - name: redis
      image: redis:alpine
      command: ['sleep', 'infinity']
      env:
        - name: PRIMARY_ENDPOINT
          valueFrom:
            secretKeyRef:
              name: example-valkey-credentials
              key: PRIMARY_ENDPOINT
        - name: READER_ENDPOINT
          valueFrom:
            secretKeyRef:
              name: example-valkey-credentials
              key: READER_ENDPOINT
        - name: AUTH_TOKEN
          valueFrom:
            secretKeyRef:
              name: example-valkey-credentials
              key: AUTH_TOKEN
        - name: PORT
          valueFrom:
            secretKeyRef:
              name: example-valkey-credentials
              key: PORT

---
# Example 3
apiVersion: v1
kind: Pod
metadata:
  name: redis
spec:
  containers:
    - name: redis
      image: redis:alpine
      command: ['sleep', 'infinity']
      volumeMounts:
        - name: credentials
          mountPath: /etc/credentials
          readOnly: true
  volumes:
    - name: credentials
      secret:
        secretName: example-valkey-credentials
        items:
          - key: credentials.json
            path: credentials.json
3. Result
3.1 ValkeyInstance
ValkeyInstance created in Kubernetes
$ kubectl get valkey
NAME             SYNCED   READY   COMPOSITION                           AGE
example-valkey   True     True    valkeyinstances.database.entigo.com   20m29s
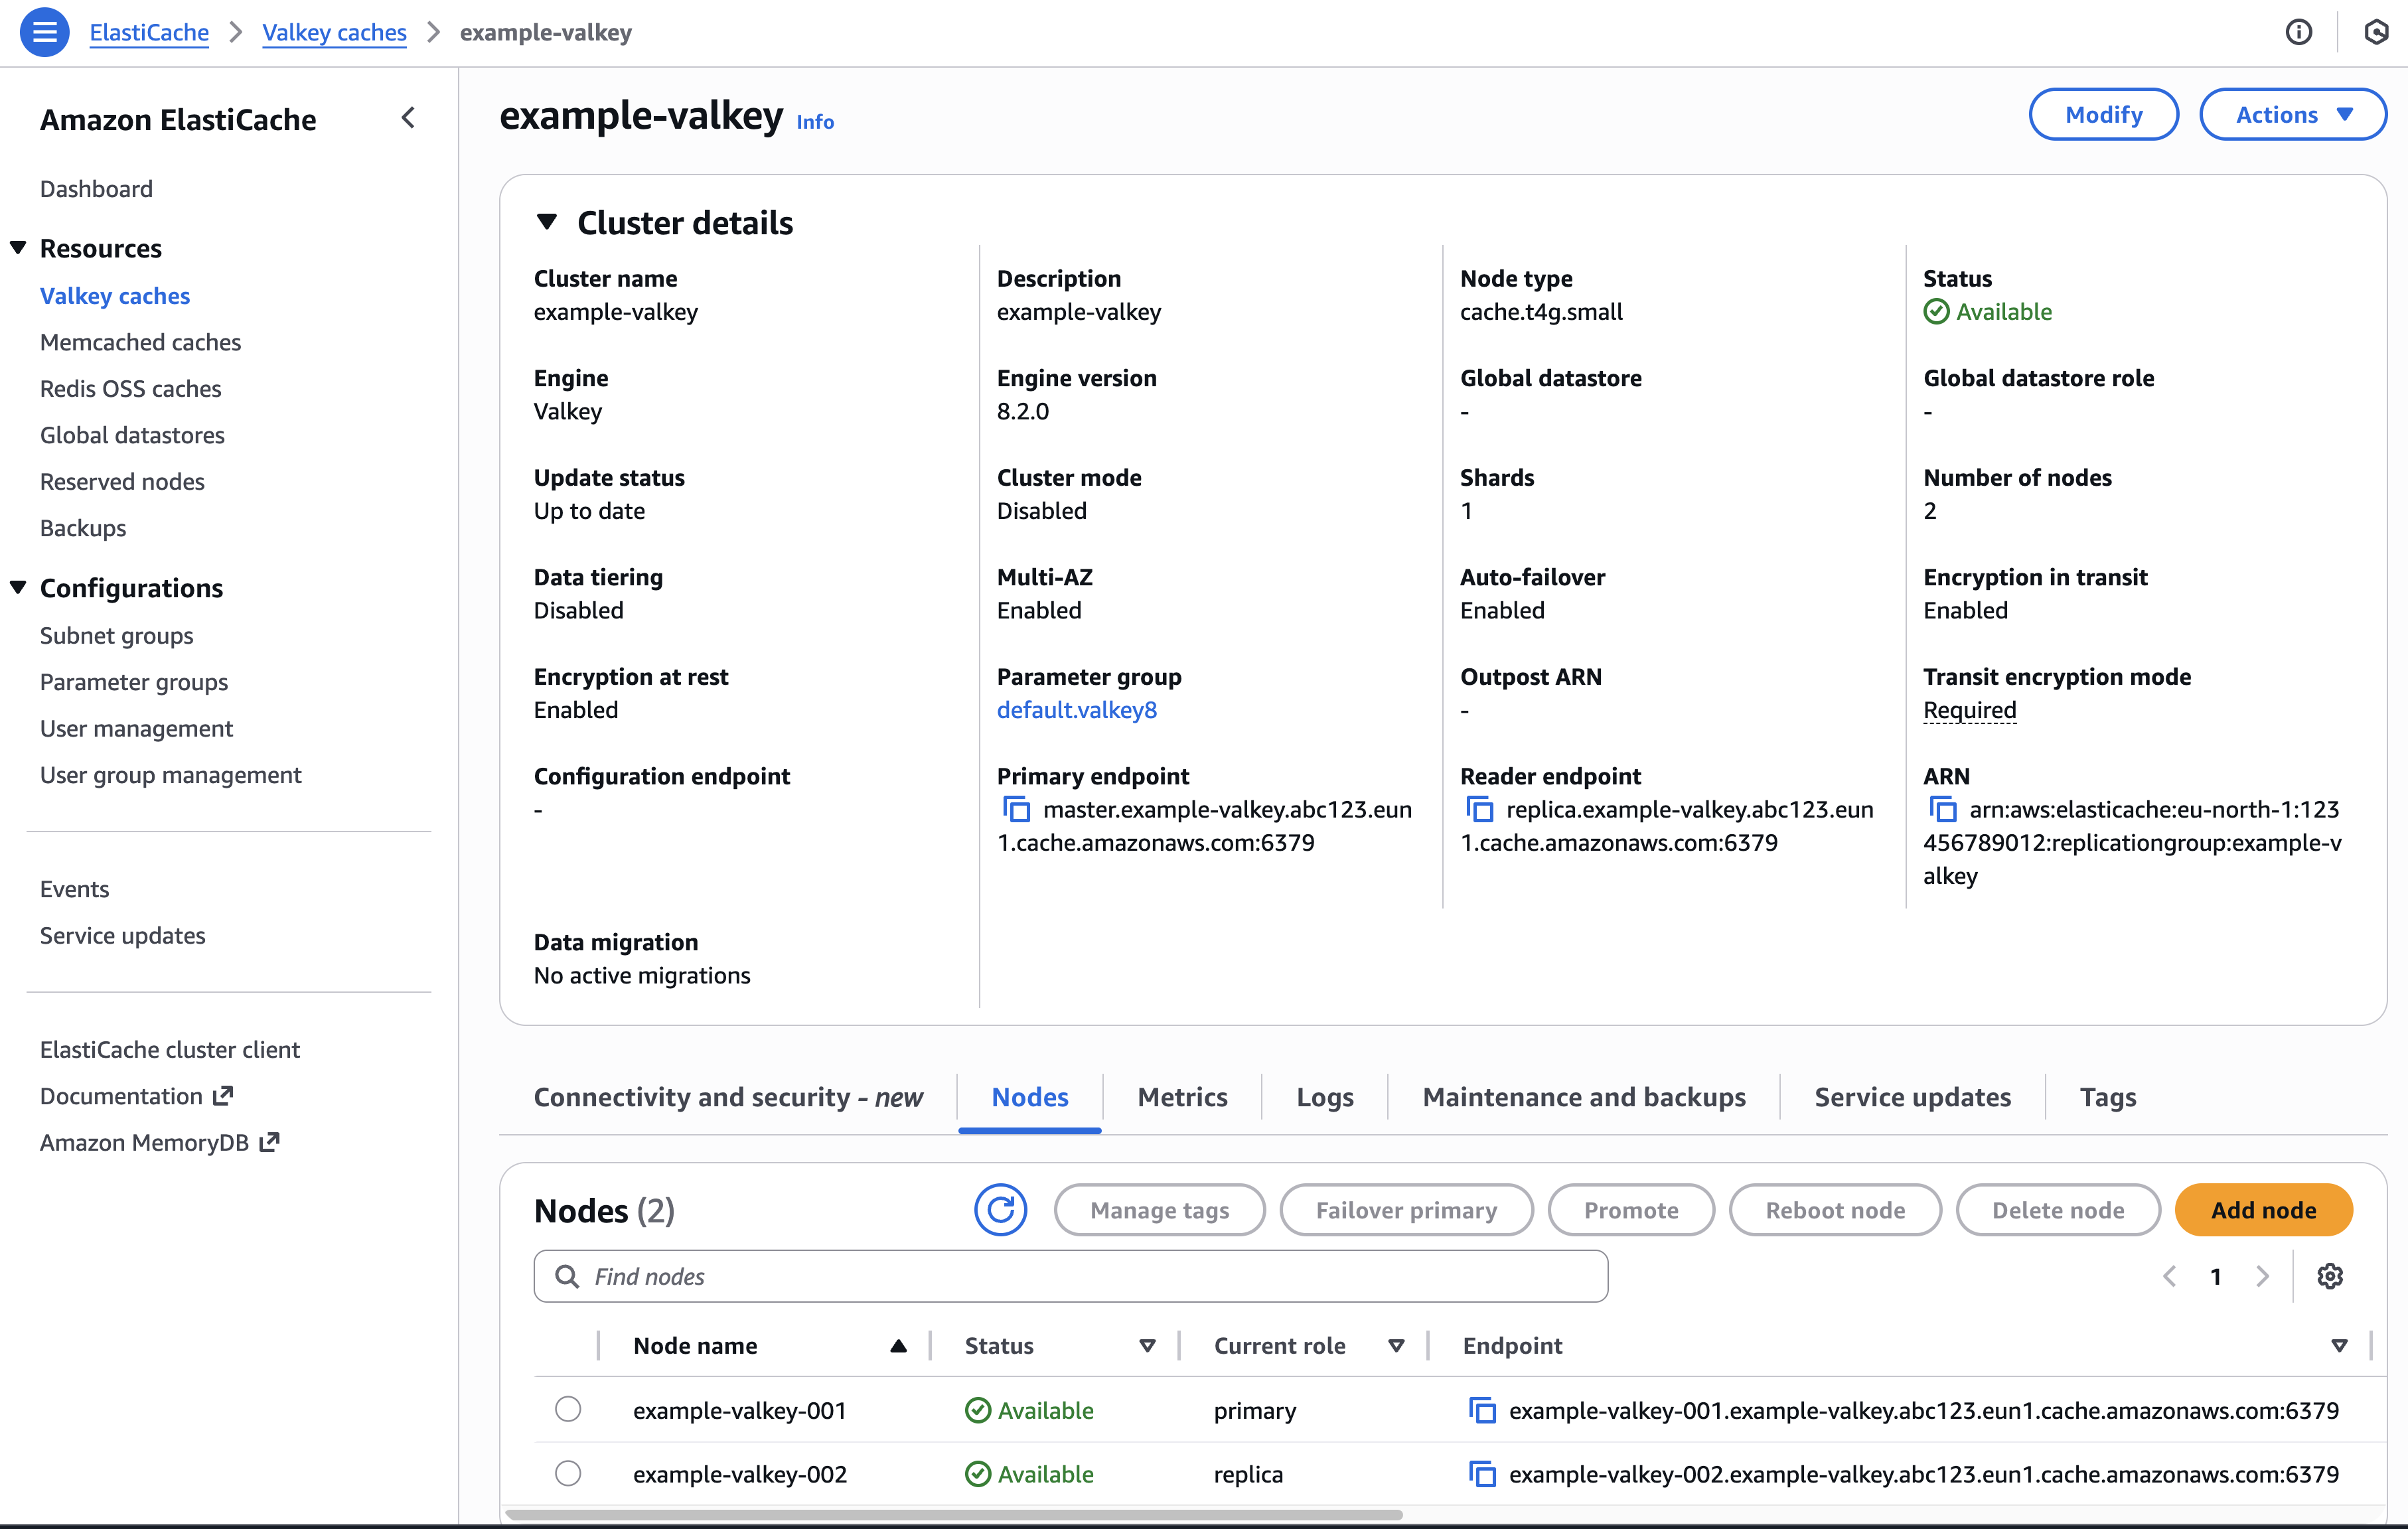
Valkey instance created in AWS
3.2 Secret with connection information
Kubernetes secret with connection information
~ kubectl get secret
NAME                         TYPE                                DATA   AGE
example-valkey-credentials   Opaque                              5      22m
$ kubectl get secret example-valkey-credentials -o yaml
apiVersion: v1
kind: Secret
metadata:
  annotations:
    crossplane.io/composition-resource-name: credentials
  name: example-valkey-credentials
  namespace: <namespace>
type: Opaque
data:
  PRIMARY_ENDPOINT: <base64-encoded-primary-endpoint>
  READER_ENDPOINT: <base64-encoded-reader-endpoint>
  AUTH_TOKEN: <base64-encoded-auth-token>
  PORT: <base64-encoded-port>
  credentials.json: <base64-encoded-credentials>
AWS Secrets Manager secret with connection information
3.3 Secrets mounted to a container
# Example 1 and Example 2
$ kubectl get pod
NAME    READY   STATUS    RESTARTS   AGE
redis   1/1     Running   0          10m

$ kubectl exec -it redis -- sh
/ env
PRIMARY_ENDPOINT=master.example-valkey.abc123.eun1.cache.amazonaws.com
READER_ENDPOINT=replica.example-valkey.abc123.eun1.cache.amazonaws.com
AUTH_TOKEN=verysecretauthtoken
PORT=6379

/ export REDISCLI_AUTH="$AUTH_TOKEN"

/ redis-cli --tls -h "$PRIMARY_ENDPOINT" -p "$PORT" PING
PONG

/ redis-cli --tls -h "$PRIMARY_ENDPOINT" -p "$PORT" SET testkey "hello"
OK

/ redis-cli --tls -h "$PRIMARY_ENDPOINT" -p "$PORT" GET testkey
"hello"
# Example 3
/ cat /etc/credentials/credentials.json
{"AUTH_TOKEN": "verysecretauthtoken", "PORT": "6379", "PRIMARY_ENDPOINT": "master.example-valkey.abc123.eun1.cache.amazonaws.com", "READER_ENDPOINT": "replica.example-valkey.abc123.eun1.cache.amazonaws.com"}
EnvironmentConfig
One Valkey default is not configured on the ValkeyInstance object. It is set once for the whole cluster in the platform-apis EnvironmentConfig, so every instance gets the same protection without developers having to think about it.
| Setting | Default | What it does |
|---|---|---|
valkeyBackupBeforeDeletion | true | Takes a final snapshot before an instance is deleted, so the data can still be recovered. |
tags | {} | Cloud tags added to every Valkey resource. See Resource Tagging. |
valkeyBackupBeforeDeletion
When enabled, deleting a ValkeyInstance takes one last snapshot before the instance disappears. That snapshot stays in AWS and can be used to bring the data back later.
Turning this off means a deleted instance is gone for good. Because Valkey is most often used as a cache that can simply be rebuilt, this is a reasonable setting to disable in environments where the contents are not worth keeping.
How many scheduled snapshots are kept, and when they are taken, is set per instance with spec.snapshotRetentionLimit and spec.snapshotWindow, as shown in the examples earlier in this guide. The cluster-wide backupRetentionPeriod setting applies to PostgreSQL and MariaDB only, not to Valkey.
Infralib Configuration Example
steps:
  ...
  - name: apps
    type: argocd-apps
    modules:
    ...
    - name: platform-apis
      source: platform-apis
      inputs:
        platform-apis:
          database:
            environmentConfig:
              valkeyBackupBeforeDeletion: true